
17 Types of Survival Bread: How to Make Hardtack and More
Survival bread used to be a common staple and it still is popular today as survival food. There are many types of bread and crackers that can be considered ‘survival bread’, like hardtack, pilot bread, and army bread. No matter which kind you get, survival bread is a timeless food that can provide you with cheap rations in emergencies.
Contents (Jump to a Section)
The Many Types of Survival Bread
Food storage can be a major problem, and survival bread is just one of the many solutions to that problem. Our ancestors figured that out, as you can tell by survival bread’s storied history. Why reinvent the wheel when it comes to long-term food storage?
Survival bread usually has a long shelf life which makes most of these recipes great in any prepper pantry.
Hardtack
Hardtack is a type of hard, dry biscuit that has been used as survival food for centuries. It can last for years when stored properly, and was a staple for soldiers and sailors during times of war and long voyages at sea. It is also sometimes known as Roman Army Bread, pilot bread, ship’s biscuit, kommissbrot, iron ration bread, commissary bread, or sea biscuit. Here’s a recipe for hardtack:
Ingredients:
- 3 cups of flour
- 1 cup of water
- 1 tsp of salt
Instructions:
- Preheat your oven to 375°F (190°C).
- Mix the flour and salt together in a bowl.
- Gradually add the water and stir until a dough forms.
- Knead the dough for about 10 minutes until it becomes smooth and elastic.
- Roll the dough out to a thickness of about 1/2 inch (1.3 cm).
- Cut the dough into small squares or circles (about 3 inches or 7.6 cm in size).
- Poke several holes in each piece of dough with a fork.
- Place the pieces of dough on a baking sheet and bake for 30 minutes or until they become hard and dry.
- Store the hardtack in an airtight container in a cool, dry place.
Here is Kris, from the well-known prepper YouTube channel City Prepping making a slightly reduced batch of hardtack:
Pemmican
Pemmican is a traditional Native American food made from dried meat and fat. It is high in protein and calories and can be used to make a hearty and nutritious survival bread. Here’s the recipe:
Ingredients:
- 2 cups of pemmican (dried meat and fat)
- 1 cup of flour
- 1 tsp of baking powder
- 1/2 tsp of salt
- 1/2 cup of dried berries (optional)
- 1/2 cup of chopped nuts (optional)
- 1 cup of water
Instructions:
- Preheat your oven to 350°F (180°C).
- Mix the pemmican, flour, baking powder, and salt together in a bowl.
- Add the dried berries and nuts (if using) and stir to combine.
- Gradually add the water and stir until a dough forms.
- Knead the dough for about 10 minutes until it becomes smooth and elastic.
- Form the dough into a loaf shape and place it on a baking sheet.
- Bake the bread for 30-40 minutes or until it becomes golden brown and firm.
- Allow the bread to cool before slicing and serving.
Clay Hayes makes a pretty good batch of Pemmican:
Field Bread
Field bread is a type of bread that was commonly used as a ration by soldiers in the field, particularly during wartime.
Field bread is designed to be a portable, durable food that can be easily carried and stored by soldiers in the field. It is similar to a type of bread known as hardtack or pilot bread but is usually a little softer and more palatable. Field bread can be eaten on its own, or used to make sandwiches or other meals.
Here is a recipe for field bread:
Ingredients:
- 3 cups of flour
- 1 cup of water
- 1 tablespoon of vegetable oil
- 1 teaspoon of salt
- 1 teaspoon of sugar
- 1/2 teaspoon of baking powder
Instructions:
- Preheat your oven to 350°F (175°C).
- Mix the flour, salt, sugar, and baking powder together in a bowl.
- Gradually add the water and vegetable oil to the bowl, stirring constantly, until the mixture becomes a thick dough.
- Knead the dough on a floured surface for about 5-10 minutes until it becomes smooth and elastic.
- Divide the dough into small portions and shape each portion into a round, flat disk.
- Place the disks on a greased baking sheet and bake them for about 25-30 minutes or until they become golden brown.
- Allow the bread to cool before storing it in an airtight container.
Garrison Bread
Garrison bread is a type of bread that was commonly made in military garrisons during the 18th and 19th centuries.
Garrison bread is a sweet, cake-like bread that was often served as a dessert or treat in military garrisons. It was typically made with ingredients that were readily available in the garrison, such as flour, butter, sugar, and dried fruits. While it is not a traditional survival bread, it can be a tasty and satisfying addition to any emergency food supply.
Here is a recipe for garrison bread:
Ingredients:
- 1 pound of flour
- 1/2 pound of butter
- 1/2 pound of sugar
- 1/2 pound of currants
- 4 eggs
- 1/4 cup of milk
- 1 tablespoon of baking powder
- 1/2 teaspoon of salt
Instructions:
- Preheat your oven to 375°F (190°C).
- Cream the butter and sugar together in a bowl until they become light and fluffy.
- Add the eggs one at a time, beating well after each addition.
- Sift the flour, baking powder, and salt together in a separate bowl.
- Gradually add the flour mixture to the butter mixture, stirring constantly.
- Stir in the currants and milk to form a stiff dough.
- Divide the dough into small portions and shape each portion into a round, flat disk.
- Place the disks on a greased baking sheet and bake them for about 25-30 minutes or until they become golden brown.
- Allow the bread to cool before serving.
Damper
Damper bread is traditionally made by Australian bushmen over an open fire, but this recipe allows you to make it in a conventional oven.
Ingredients:
- 4 cups of self-rising flour
- 1/4 cup of butter, chilled and cut into small cubes
- 1/4 cup of sugar
- 1 cup of milk
- 1/2 cup of water
Instructions:
- Preheat your oven to 375°F (190°C).
- In a large bowl, mix the flour, sugar, and chilled butter together using your fingertips until the mixture becomes crumbly.
- Make a well in the center of the mixture and add the milk and water.
- Stir the mixture with a wooden spoon until a dough forms.
- Turn the dough out onto a floured surface and knead it lightly until it becomes smooth.
- Shape the dough into a round loaf and place it on a greased baking sheet.
- Use a sharp knife to make a cross-shaped cut on the top of the loaf.
- Bake the bread for about 40-45 minutes or until it becomes golden brown.
- Allow the bread to cool before slicing and serving.
Here is some authentic damper being made in the bush:
Flatbread
Flatbread is a simple, unleavened bread that can be made quickly and easily over an open flame. Here’s the recipe:
Ingredients:
- 2 cups of flour
- 1/2 tsp of salt
- 3/4 cup of water
Instructions:
- Mix the flour and salt together in a bowl.
- Gradually add the water and stir until a dough forms.
- Knead the dough for a few minutes until it becomes smooth and elastic.
- Divide the dough into several small balls.
- Roll each ball out into a thin circle.
- Cook each flatbread on a hot, greased skillet or griddle for a few minutes on each side until it becomes golden brown.
- Serve the flatbread warm.
Bannock Bread
Bannock bread is a traditional bread that has been made by Scottish indigenous peoples for centuries. It’s a simple, unleavened bread that can be cooked over an open fire. Here’s the recipe:
Ingredients:
- 2 cups of flour
- 2 tsp of baking powder
- 1/2 tsp of salt
- 1/4 cup of oil
- 3/4 cup of water
Instructions:
- Mix the flour, baking powder, and salt together in a bowl.
- Add the oil and water and stir until a dough forms.
- Knead the dough for a few minutes until it becomes smooth and elastic.
- Divide the dough into several small balls.
- Flatten each ball into a thin circle.
- Cook each bannock on a hot, greased skillet or griddle for a few minutes on each side until it becomes golden brown.
- Serve the bannock warm.
Ezekiel Bread
Ezekiel bread is a type of bread that’s made with sprouted grains and legumes. It’s a highly nutritious bread that’s often used in religious ceremonies. Here’s the recipe:
Ingredients:
- 2 cups of sprouted wheat flour
- 1 cup of sprouted spelt flour
- 1/2 cup of sprouted barley flour
- 1/4 cup of sprouted lentil flour
- 1/4 cup of sprouted soy flour
- 2 tsp of salt
- 1 tbsp of honey
- 1 1/2 cups of warm water
- 2 1/4 tsp of active dry yeast
Instructions:
- Preheat your oven to 375°F (190°C).
- Mix the sprouted flours and salt together in a bowl.
- In a separate bowl, dissolve the honey in the warm water.
- Add the yeast to the honey water and stir to combine.
- Let the yeast mixture sit for 5-10 minutes until it becomes frothy.
- Add the yeast mixture to the flour mixture and stir until a dough forms.
- Knead the dough for about 10 minutes until it becomes smooth and elastic.
- Form the dough into a loaf shape and place it on a greased baking sheet or in a greased bread pan.
- Allow the dough to rise for about 30 minutes.
- Bake the bread for 30-40 minutes or until it becomes golden brown and sounds hollow when tapped.
- Allow the bread to cool before slicing and serving.
Ezekiel bread has plenty of ingredients but isn’t that hard to make.
Roosterkoek
Roosterkoek is a type of bread that is traditionally made in South Africa over an open fire or braai (barbecue).
Roosterkoek is a delicious and versatile bread that can be served as a side dish or snack. It is also a popular choice for outdoor cooking and camping, as it can be cooked over an open fire. While it is not a traditional survival bread, it can be a tasty and enjoyable addition to any emergency food supply.
Here is the recipe:
Ingredients:
- 4 cups of flour
- 2 teaspoons of instant yeast
- 2 tablespoons of sugar
- 1 teaspoon of salt
- 1 cup of warm water
- 1/4 cup of vegetable oil
- extra flour for dusting
Instructions:
- In a large bowl, combine the flour, instant yeast, sugar, and salt.
- Add the warm water and vegetable oil to the bowl and mix until a sticky dough forms.
- Turn the dough out onto a floured surface and knead it for about 10 minutes until it becomes smooth and elastic.
- Return the dough to the bowl and cover it with a damp towel. Allow it to rise in a warm, draft-free place for about an hour, or until it has doubled in size.
- Once the dough has risen, punch it down and divide it into small portions (about the size of a tennis ball).
- Flatten each portion of dough into a disk about 1/2 inch thick.
- Lightly dust each disk with flour and place them on a greased grid or over a fire.
- Cook the Roosterkoek for about 8-10 minutes on each side, or until they become golden brown and cooked through.
- Serve hot with butter or your favorite topping.
Here is some Roosterkoek with a twist:
Beer Bread
Ingredients:
- 3 cups of self-rising flour
- 3 tbsp of sugar
- 1 can of beer (12 oz)
Instructions:
- Preheat your oven to 375°F (190°C).
- Mix the flour and sugar together in a bowl.
- Pour the beer into the bowl and stir until a dough forms.
- Pour the dough into a greased bread pan.
- Bake the bread for about 50 minutes or until it becomes golden brown.
- Allow the bread to cool before slicing and serving.
Potato Bread
Potato bread is delicious but the yeast requirement can be limiting.
Ingredients:
- 2 cups of warm mashed potatoes
- 1 cup of warm milk
- 1/4 cup of sugar
- 2 tbsp of active dry yeast
- 1/2 cup of melted butter
- 2 eggs
- 6-7 cups of flour
- 1 tbsp of salt
Instructions:
- Preheat your oven to 375°F (190°C).
- In a large bowl, mix the mashed potatoes, warm milk, sugar, and yeast together.
- Add the melted butter and eggs to the bowl and stir to combine.
- Gradually add the flour and salt to the bowl, stirring until a dough forms.
- Knead the dough on a floured surface for about 10 minutes until it becomes smooth and elastic.
- Place the dough in a greased bowl and cover it with a damp towel.
- Allow the dough to rise in a warm, draft-free place for about an hour.
- Punch down the dough and knead it again for a few minutes.
- Divide the dough into two equal parts.
- Shape each part into a loaf shape and place it in a greased bread pan.
- Allow the dough to rise again for about 30 minutes.
- Bake the bread for about 40 minutes or until it becomes golden brown.
- Allow the bread to cool before slicing and serving.
Cornbread
Most people know and have had cornbread and there are countless recipes. Here is the recipe I go with:
Ingredients:
- 1 cup of cornmeal
- 1 cup of flour
- 1/4 cup of sugar
- 1 tbsp of baking powder
- 1 tsp of salt
- 1 egg
- 1 cup of milk
- 1/4 cup of melted butter
Instructions:
- Preheat your oven to 400°F (200°C).
- Mix the cornmeal, flour, sugar, baking powder, and salt together in a bowl.
- In a separate bowl, whisk the egg, milk, and melted butter together.
- Add the wet ingredients to the dry ingredients and stir until a batter forms.
- Pour the batter into a greased skillet or baking dish.
- Bake the cornbread for about 20-25 minutes or until it becomes golden brown.
- Allow the cornbread to cool before slicing and serving.
Sourdough Bread
Sourdough bread is made with a sourdough starter, which is a mixture of flour and water that has been fermented by naturally occurring yeast and bacteria. It can be easier to maintain than yeast in a survival situation since it doesn’t require store-bought yeast. Here’s the recipe:
Ingredients:
- 1 cup of sourdough starter
- 3 cups of flour
- 1 tsp of salt
- 1 cup of water
Instructions:
- Preheat your oven to 375°F (190°C).
- Mix the sourdough starter, flour, and salt together in a bowl.
- Gradually add the water and stir until a dough forms.
- Knead the dough for about 10 minutes until it becomes smooth and elastic.
- Place the dough in a greased bowl and cover it with a cloth.
- Allow the dough to rise in a warm place for several hours (or overnight) until it has doubled in size.
- Punch down the dough and shape it into a loaf.
- Place the dough on a greased baking sheet or in a greased bread pan.
- Allow the dough to rise again for another hour or so.
- Bake the bread for 30-40 minutes or until it becomes golden brown and sounds hollow when tapped.
- Allow the bread to cool before slicing and serving.
Sprouted Grain Bread
Sprouted grain bread is made with grains that have been sprouted to increase their nutritional value and make them easier to digest. Here’s the recipe:
Ingredients:
- 3 cups of sprouted wheat flour
- 1 tsp of salt
- 1 tbsp of honey
- 1 1/2 cups of warm water
- 2 1/4 tsp of active dry yeast
Instructions:
- Preheat your oven to 350°F (180°C).
- Mix the sprouted wheat flour and salt together in a bowl.
- In a separate bowl, dissolve the honey in warm water.
- Add the yeast to the honey water and stir to combine.
- Let the yeast mixture sit for 5-10 minutes until it becomes frothy.
- Add the yeast mixture to the flour mixture and stir until a dough forms.
- Knead the dough for about 10 minutes until it becomes smooth and elastic.
- Form the dough into a loaf shape and place it on a greased baking sheet or in a greased bread pan.
- Allow the dough to rise for about 30 minutes.
- Bake the bread for 30-40 minutes or until it becomes golden brown and sounds hollow when tapped.
- Allow the bread to cool before slicing and serving.
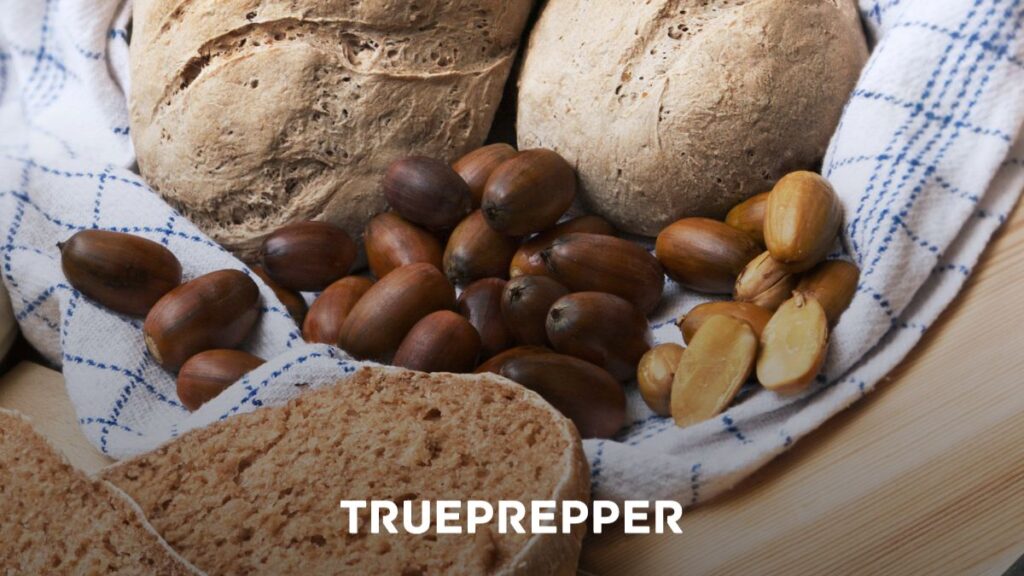
Acorn Bread
Acorn bread requires a ton of prep work to get the tannins out of the acorns. Acorns themselves are all over the area I live (North Carolina) so they are a little-known survival food since most people don’t know they can be made edible.
Ingredients:
- 1 cup acorn flour
- 1 cup all-purpose flour
- 2 tablespoons baking powder
- ½ teaspoon salt
- 3 tablespoons sugar
- 1 egg beaten
- 1 cup milk
- 3 tablespoons oil
Instructions:
- Preheat oven to 400 degrees.
- Grease a loaf pan to prevent sticking.
- Combine acorn flour, all-purpose flour, baking powder, salt, and sugar in a bowl.
- Combine egg, milk, and oil in a bowl.
- Stir the wet and dry bowls together to create a lumpy batter.
- Pour the lumpy batter into the greased pan.
- Bake at 400 degrees for 30 minutes.
- Remove the pan, turn off the oven, and let cool.
You’ll probably need some help figuring out what acorn flour is and how to make it, so check out our entire guide on How to Make Acorn Bread.
Canned Bread
It used to be widespread, but finding canned survival bread these days can be elusive. There are a few very different options from pilot bread to brown bread, but not many options in between.

Pilot Bread Crackers
These crackers don’t have the same ingredients as hardtack but still have a massive shelf life and are protected in a vacuum-sealed can with oxygen absorbers to boot.
Ingredients
- Flour
- Vegetable Shortening
- Sugar
- Corn Syrup
- Whey
- Leavening
- Salt
They aren’t cheap, but care is taken in packaging to make them last on the shelf ridiculously long.
Here are the specs on the crackers packed tightly in the can:
- #2.5 can with 12 crackers
- 100 calories per cracker (1200 per can)
- 9.9 ounces
- vacuum sealed
- oxygen absorber
- desiccant
- Made in the USA
- 30+ year shelf life
If you can find some online it may be worth picking up since it is so easy to add to your food storage plan. In a world of fast-perishing foods, survival bread in a can must not make much of a profit for food producers since it is a scarce commodity now.
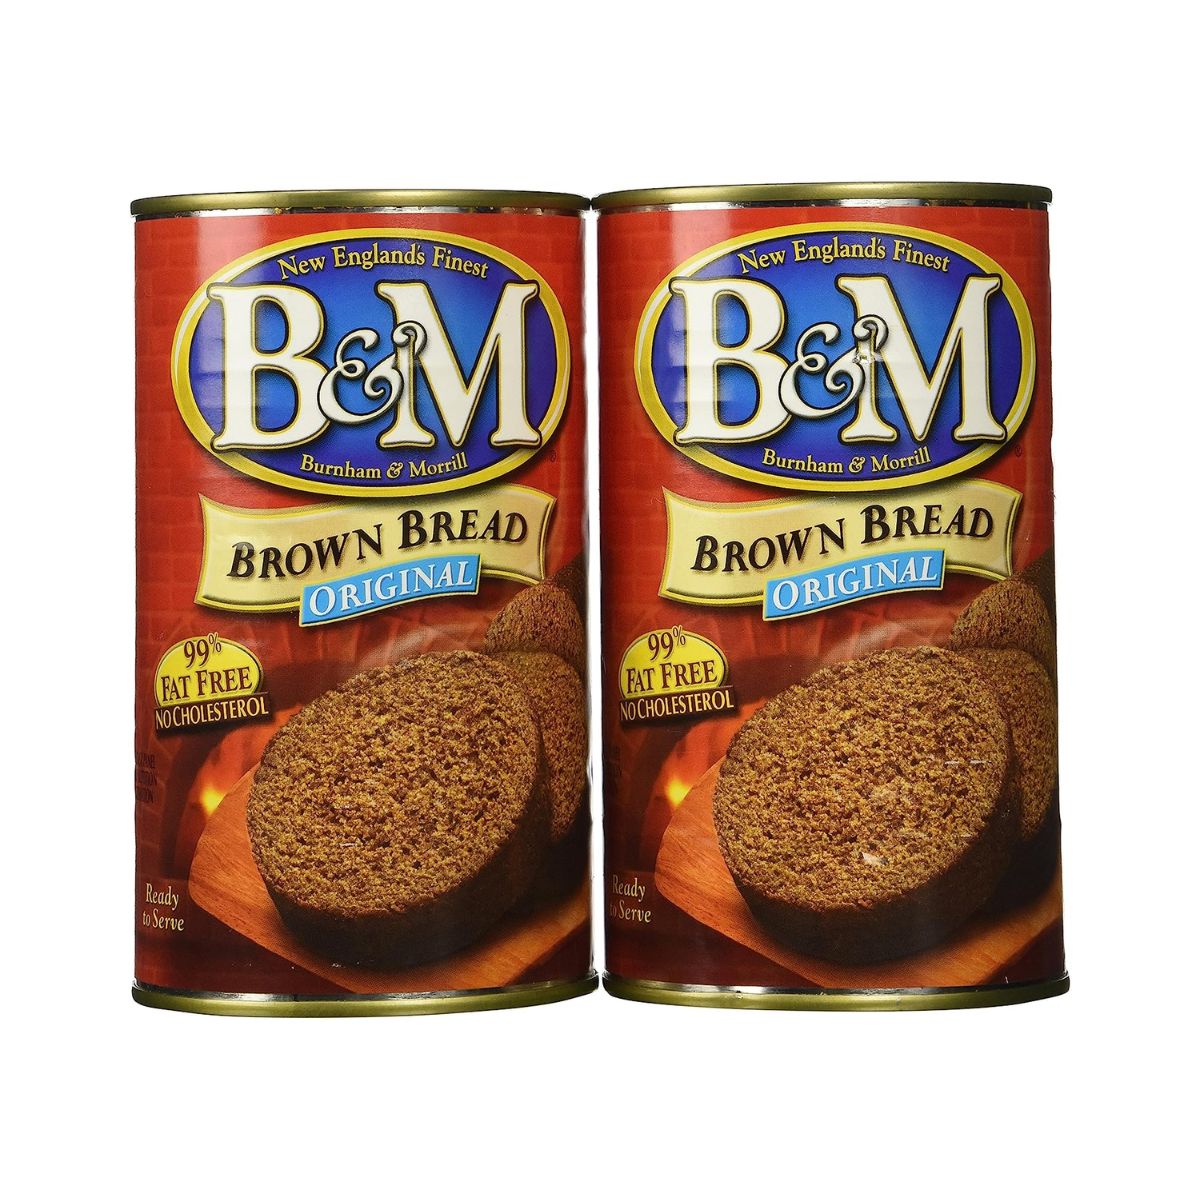
Brown Bread
This is the survival bread with the most moisture on the list. So moist, in fact, that it can crumble apart if you try to make a sandwich out of it.
Ingredients
- Water
- Wheat Flour
- Molasses
- Rye Flour
- Whey
- Corn Meal
- Baking Soda
- Buttermilk
- Salt
- Corn Oil
Being canned molasses bread, it is very moist, crumbly, and sweet.
Older folks will recognize this bread as it’s been around a while. Here are the specs on it packed in the can:
- 1040 calories per can
- 16 ounces per can
- Made in the USA (Portland, Maine)
- 3+ year shelf life
They recommend you open both sides of the can to more easily slide the loaf out, and then heat it wrapped in an oven for 30 minutes at 300 F. Many people claim this is really good with baked beans, though I haven’t personally tried it.
The Final Word
Survival bread is a great inclusion in any long-term food storage plan. You can tweak any of these recipes to your and your family’s liking to be sure that everyone enjoys the bread. Pair survival bread with peanut butter for a great emergency snack. It is easy to make, tastes good, and is shelf-stable; add both to your plan.
Here are some more guides our subscribers find useful:
- The 10 Best Canned Foods to Stockpile for Survival
- The Best Freeze Dryer for Drying Food at Home
- Survival Food List | Pantry Stockpile Plan and Checklist
Keep exploring, stay prepared, and be safe.
You’ve Been Missing Out
Join the 2+ million preppers that rely on our prepping advice by subscribing to TruePrepper.- Practical guides and tips
- Useful survival giveaways
- Free, forever
- < 0.4% of people unsubscribe

Would you recommend making a lot of these? After wrapping in foil, how would you store, for long term use?
I recommend making a proportional amount to the other food storage you may have. It is good to have a balance of a variety of items. Ideally, you would want to store in an air tight container inside a dry pantry or storage area that remains below 68 degrees. If you don’t have perfect conditions for storage, just focus on keeping humidity and bugs away from them.
I would think using a vaccuum sealer for ths would be good. Even packing it in a mason jar when cooking it would work; let it cool put a lid on and use the jar vaccuum sealer would remove all air and seal the lid for long term storage…..?
Is the powdered milk and/or the jello supposed to be in liquid form? I ask because there is no way that 3 tablespoons of water is enough to soak up all those dry mixes. If the powdered milk is supposed to be liquid and not powdered, then you should state that, because non-fat milk would probably accomplish the same thing (if you say powdered, I assume you mean in powder form.
Hi John, The powdered milk and jell-o are added in powdered form. Please go to TheReliantSelf.blogspot.com. The original article is posted there with pictures and instructions. It is explained there that is how the recipe was received, but the author found it necessary to add more water. The bread is moist, and the pictures are helpful. Good luck!